rails: adding a preview option to new form

Suppose we wanted to modify a basic Rails application so there was the option of a preview before creating a new record.

What is a good pattern for adding a second button to a form?

There are two options:

  1. One controller action with a flag: nice articles by EyeDeal and Myers Development (from 2008 and 2006, respectively, but still accurate)
  2. Two controller actions where there are two form buttons that each post to a separate action

I like having two controller actions, since it feels to me like different behavior should live in different actions. The complete code is posted on github, which creates a new_preview action, slightly modifies the new action so it can be called with parameters, and makes corresponding view changes.

Here’s what I did to create the app (on the command line):

rails notes
cd notes
ruby script/generate scaffold note title:string content:text

Then I edited app/controllers/notes_controller.rb:

def new_preview
  @note = Note.new(params[:note])
end

Then I edited app/views/notes/new.html.rb to add a button that triggers the new action (see whole file):

  <%= f.submit 'Preview', :onclick => "this.form.action='new_preview'"%>

And then I created the new_preview template file (app/views/notes/new_preview.html.erb) which I made look just like the show page with a hidden form:

<p>
  <b>Title:</b>
  <%=h @note.title %>
</p>
<p>
  <b>Description:</b>
  <%=h @note.description %>
</p>
<% form_for(@note) do |f| %>
  <%= f.hidden_field :title, :value => @note.title %>
  <%= f.hidden_field :description, :value => @note.description %>
  <p>
    <%= f.submit 'Re-Edit', :onclick => "this.form.action='new'" %>
    <%= f.submit 'Create' %>
  </p>
<% end %>

and finally, I edited the ‘new’ action so that it could accept parameters to fill in the form (to handle the case of “Re-Edit”)

  def new
    @note = Note.new(params[:note])
    respond_to do |format|
      format.html # new.html.erb
      format.xml  { render :xml => @note }
    end
  end

Overall I like this solution. There is a clear separation of code between preview and create.

However….

There was some interesting discussion via twitter about this. I must admit that using onclick like that feels a little hack-ish. Greg Moeck offered an alternate methodology, which seemed like a lot of code to solve a simple problem. Elad Meidar argued that my technique was obtrusive. I wonder… seems to me that the whole idea behind unobtrusive Javascript is to separate behavior from structure. But we put behavior in ERB files all the time, like “link_to ‘Edit’, edit_note_path(note)” or even “form_for(@note)” … I wonder if the trick would be :onclick => “this.form.action=’#{new_note_path}’”

Interested in other people’s thoughts, suggestions, code snippets…

Finding Ada Through… Danielle Wheeler!

In Honor of Ada Lovelace Day I would like to highlight the hard work and accomplishments of Danielle Wheeler, a Software Engineer I had the pleasure of working with at Laszlo Systems. Danielle came to Laszlo straight out of college, and quickly became a key contributor to a large production code base. She picks up new technology incredibly quickly, and puts a lot of thought and care into her work. She is a great asset to her team, and I hope to work with her again some day!

Ruby Classes in March

Ruby classes will be taught by Liah Hansen and Sarah Allen. Blazing Cloud is offering two classes, both on Sunday afternoons, for six sessions: March 7 - April 18th. (Note: class will not be held April 4th.) Also, note that Sarah is teaching a full week of classes on Ruby and Rails March 15-19 (details below).

Ruby for Programmers, Sundays 2-4pm

This class is designed for people with programming experience in another language or who have been introduced to Ruby through Rails and want to learn more Ruby.

In this class we will focus on learning the Ruby language through exploratory development and test-first teaching. Weekly homework assignments will provide hands-on reinforcement of concepts. We will dive deeply into Objects and Classes and cover Modules, Arrays, Hashes, String, Regular Expressions, and do practical things in the file system and over http. You will build a gem!

You will receive a book, “The Well-Grounded Rubyist” by David Black, which will supplement the class instruction. All other proceeds will go toward paying instructors and covering the facilities. We don’t have refunds set up, but if you sign up and can’t make it we’ll certainly see what we can do to connect you to someone else who may be interested.

Click Here to Sign Up

Learn to Program, Sundays 4:30-6:30pm

This is an introductory Ruby class for people who are new to programming or have up to a year of programming experience in another language. We will be using the book “Learn to Program” by Chris Pine and using test-first teaching exercises. There class will meet for 2 hours and there will be homework and reading assignments in between the classes. Everyone must bring their own laptop.

Kids are welcome as students! However, if they are 12 or under, they must bring a grown-up.

You will receive a book which will supplement the class instruction. All other proceeds will go toward paying instructors and covering the facilities. We don’t have refunds set up, but if you sign up and can’t make it we’ll certainly see what we can do to connect you to someone else who may be interested.

Click Here to Sign Up

Ruby and Rails — full day classes March 15-19

Sarah Allen is also teaching a full week of Ruby and Rails at Marakana in March. There will be a 2 day Ruby class and 3 day Rails class, or you can sign up for both.

Scholarships

To apply for a scholarship for any of the classes, please fill out this form.

Test Driven Development for iPhone

UPDATE:
Check out the project source code at: http://github.com/blazingcloud/iphone_logic_testing

Here at Blazing Cloud we really like Test-Driven Development (TDD). We try to use it for all of our development projects, and we recently learned how to do it for IPhone development.

The unit test tool available for Cocoa development is more like JUnit for Java than RSpec for Ruby. Each test is implemented as a method, and it is described by its method name, so you need to get creative with camel case. In addition, the error messages that you get out of the c compiler are difficult to parse (at least to those of us with limited c experience), which makes the watch it fail first and then fix it methodology difficult. However, it is still worth suffering in the unfriendly environment to get the benefits of a full test suite. Hopefully the knowledge that we gained in muddling through this will help you get started in your own project.

There are two types of tests suites for IPhone development: Logic Tests and Application Tests.

  • Logic Tests test business logic and are run independently of any device (including the emulator).
  • Application Tests test the UI and everything that can only be tested on the device.

This article will detail how to develop business logic code using Logic Tests. We will follow up with Application Testing in a subsequent article. The Apple developer site has documentation for Unit Testing Applications, and you may want to read this document first. We will walk through the set-up in this article but if you need more detail you may find it in the Apple site.

Logic Testing

We will now demonstrate Logic Testing using a simple tip calculator as an example. To begin (with iPhone SDK and Xcode installed) launch XCode and create a new View Based IPhone Application called TipCalc. As a sanity check you can try to run this empty app in the simulator and you will see an empty view screen.

Make a new target for your logic tests. Right click Targets and select Add -> New Target. Select Unit Test Bundle and name the bundle “Logic Tests”. You can close the little info window that comes up, and you will see your new target in the Targets group.

Create a new group under the TipCalc main group called “LogicTests”. This will look like a directory under your TipCalc application as shown here:

Add a new file to the LogicTests group that is of type Objective-C test case class and call it “TipCalcTests.m”. Make sure the box is checked to create the associated header (.h) file, and select only the Logic Tests target to add the new file to. When you hit Finish the two new files will be added.

At this point you should try to run your tests. Make Logic Tests your active target and click Build and Run. You won’t really see anything happen when you do this, but look in the lower right corner of your XCode window:

Click on the red error icon to open up the build results window. The errors you see won’t really make any sense at this point, and I think its because they are generated during the run step and this target doesn’t have an executable to run. If you click Build instead of Build and Run you will get a more informative error. You don’t actually have to run anything because the tests are executed during the build step.

The new error should look like this:

This error is happening because when you create a new test case file by default it is set up to be an Application test, not a Logic test, so it expects to find an ApplicationDelegate instance, which is only present in the running app. You can remove the code that is for application testing from these test files, as you will make separate test files for those tests. In your header file remove these lines:

//  Application unit tests contain unit test code that must be injected into an application to run correctly.
//  Define USE_APPLICATION_UNIT_TEST to 0 if the unit test code is designed to be linked into an independent test executable.
#define USE_APPLICATION_UNIT_TEST 1

and these lines:

#if USE_APPLICATION_UNIT_TEST
- (void) testAppDelegate;       // simple test on application
#else
- (void) testMath;              // simple standalone test
#endif

so that you just have an empty header file. From the implementation file you can remove these lines:

#if USE_APPLICATION_UNIT_TEST     // all code under test is in the iPhone Application
- (void) testAppDelegate {
    id yourApplicationDelegate = [[UIApplication sharedApplication] delegate];
    STAssertNotNil(yourApplicationDelegate, @"UIApplication failed to find the AppDelegate");
}
#else                           // all code under test must be linked into the Unit Test bundle
- (void) testMath {
    STAssertTrue((1+1)==2, @"Compiler isn't feeling well today :-(" );
}
#endif

so you have an empty implementation file. Now if you hit Build again you will not have any errors, and we can start writing some tests.

In the spirit of TDD we will write a test first before we write any other code. Add the following code to your implementation file:

- (void) testTipCalculation {
    float percentage = .20;
    float bill = 34.45;
    float expectedTotal = percentage * bill;
    NSLog(@"expected total: %f", expectedTotal);
    float result = [TipCalculator calculateTipFor:bill andPercentage:percentage];
    STAssertEquals(expectedTotal, result, @"Tip not calculated correctly. Expected %f but got %f", expectedTotal, result);
}

and the corresponding declaration in your header file:

@interface TipCalcTests : SenTestCase {
}
- (void) testTipCalculation;
@end

Build again and you will get a useful error: “‘TipCalculator’ undeclared (first use in this function)” because we haven’t defined the TipCalculator class. Add the TipCalculator class to the Classes group and add it to both the TipCalc and Logic Tests targets. Edit TipCalcTests.h and import TipCalculator.h like so:

#import "TipCalculator.h"

Run your tests again and you will see the following results:

As you can see, the error message isn’t particularly helpful, but there is a warning that tells us “‘TipCalculator’ may not respond to ‘+calculateTipFor:andPercentage:’”

Add the method declaration now to your TipCalculator header:

+ (float)calculateTipFor:(float)bill andPercentage:(float)percentage;

and a stub for the method in your implementation file that returns a hard coded value:

+ (float)calculateTipFor:(float)bill andPercentage:(float)percentage {
	return 0.8;
}

Now when you build you will get a useful error telling you that your test failed:

Notice that the only thing that it prints out is the error message you specifically told it to generate including the expected and actual values. So you will need to make sure your test results statements are meaningful.

If you run into issues it might be useful to log things to the console. In the sample code there is an NSLog statement:

NSLog(@"expected total: %f", expectedTotal);

This output doesn’t get written to the run console in XCode (maybe because the tests are executed during the build step, not the run step?) but it does get written to the system console. You can find the system console by typing “console” into spotlight. The system console looks like this:

A lot of messages get printed here, but if you filter the list by the string “otest” you will see your messages. If anyone knows how to get log output to show up in XCode please leave us a comment.

If you do want to launch your app in the simulator every time you run your tests you can just drag you TipCalc target into your Logic Tests target and click Build and Run instead of Build.

So that’s basically it, now you know how to write Logic Tests. You can find a complete list of test macro functions (like STAssertEquals) in the Unit-Test Result Macro Reference in the Apple site.

Insourcing

Outsourcing has become a familiar pattern in the software industry. As an alternative to high-priced American workers, companies will hire people overseas at a fraction of the hourly wage. I propose an alternate model of “insourcing” — hiring folks close to home who have the smarts and some of the skills but not the domain expertise. This is particularly effective for software development.

Outsourcing creates additional cost of project and engineering management overhead and time zone lag; however, even adding those costs, it appears to be quite economical. Some companies have mastered this model, but many who try it fail. Those that succeed go through several costly iterations to make it so, and I would guess that the vast majority of initial engagements fail to yield any successful return. Most small companies simply cannot afford such experimentation. Tech leads and managers should be focused on growing the core business, rather than purely cost saving efficiencies.

An alternative insourcing model is far easier to make successful and implement in small scale. In my own small business, driven through an interest in pair programming and increasing diversity, I stumbled upon something that works from a purely capitalistic perspective. I have employed a series of interns, who pair program with me and other engineers. Using this method of working, it shortens the length of time before they are contributing significantly to the project and speeds their learning of the tools and techniques required for the work.

There are a lot of smart people with a background in software engineering who are struggling to find a job today. These are folks who spent a few years too long at a job and now those skills aren’t marketable, or they took off six years to care for a child and their skills are rusty, or they just got out of school and have zero experience. These folks need jobs. These folks are under-employed, considering minimum wage in alternate professions. We need them in our industry.

Instead of outsourcing to another country, I think everyone who has or seeks to grow a team of engineers should consider insourcing: hiring someone who is smart, has a foundation as a programmer, but who lacks the specific experience needed to work at your company. Anyone can do this. The key elements are

  • you have a clear need for development work that can be done by a junior or mid-level engineer
  • you have someone who really wants to act as a mentor
  • you are willing to trade some training time for some cost benefit
  • you understand that there is always risk in hiring anyone, and you are willing to take a risk and manage that risk in exchange for a potentially awesome long-term hire

Anyone can do this, but some local companies have expressed an interest in getting intern programs started. I’m figuring out how to lesson the need for someone experienced in mentoring and teaching by bringing in a pair of programmers (one senior/one intern) or providing clear guidelines and support for an intern working in an existing team. I’m leveraging my specific experience and on-going training sessions to kick-start the process at other companies. Interns can read more and apply and companies can contact me directly, but I am also interested in hearing from other people near or far who have had success with similar programs.

Mobile Training

I just finished a 3 day mobile training session in Columbus, Ohio. I taught cross-platform mobile development with Rhodes, RhoSync and mobile web UI techniques. I was thrilled to be joined by Brian Moore, who demonstrated how to use mspec with Rhodes (rspec-like testing framework for mobile) and a new debugger that supports breakpoints, stepping, inspecting and modifying data in your mobile Ruby code. Way cool.

On day two, we spend the afternoon coding in teams:

teamwork
Teamwork

moment of success
Moment of Success

cross-platform coding
Cross-Platform Coding

BlackBerry browser limitations

Developing on BlackBerry Web UI is like stepping into 1996 with one-hand tied behind your back. It teases you into thinking you can use css, but without the ability to position divs, table-based layouts are the way to go. If you are surfing the open web, you get to use the 4.7 browser on newer devices; however, if you are using a web UI control in your app, either natively, or with the Rhodes framework, then you are using the BlackBerry 4.2 browser.

From the BlackBerry Browser Version 4.2 Content Developer Guide (p. 120-121)

Element/CSS property matrix

Element/CSS property matrix (continued)

Additionally, you a free to use any font, as long as it Arial, Courier or Helvetica — and I don’t believe Helvetica was designed to really look like this. Here a screenshot of your options (with code below):

.arial {
 font-family: "Arial";
}
.arial12 {
 font-family: "Arial";
 font-size: 12px;
}
.c {
 font-family: "Courier";
}
.c12 {
 font-family: "Courier";
 font-size: 12px;
}
.helv {
 font-family: "Helvetica";
}
.helv12 {
 font-family: "Helvetica";
 font-size: 12px;
}
<p>no font</o>
<div class="arial">
	<p>Arial <b>bold</b></p>
</div>
<div class="arial12">
	<p>Arial 12pt <b>bold</b></p>
</div>
<div class="c">
	<p>Courier <b>bold</b></p>
</div>
<div class="c12">
	<p>Courier 12pt <b>bold</b></p>
</div>
<div class="helv">
	<p>Helvetica <b>bold</b></p>
</div>
<div class="helv12">
	<p>Helvetica 12pt <b>bold</b></p>
</div>

Lastly, here’s a handy list of screen resolutions you will need to consider (via Mobile Phone Digger). It is critical that you test on the device early, since the range of pointer accuracy on the BlackBerry is vast — from the precision of the Bold or Curve where the trackball lets you roll from element to element to the tactile frustrations of the Storm where you need to leave wide spaces around your UI elements to give people any hope of hitting them.

BlackBerry 857 160 x 160
BlackBerry 8830 320 x 240
BlackBerry 950 132 x 65
BlackBerry 957 160 x 160
BlackBerry 7100 240 x 260
BlackBerry 7130 240 x 260
BlackBerry 7520 240 x 160
BlackBerry 7730 240 x 240
BlackBerry 7750 240 x 240
BlackBerry 7780 240 x 240
BlackBerry 8120 240 x 260
BlackBerry 8130 240 x 260 (Pearl)
BlackBerry 8220 240 x 320 (Pearl Flip)
BlackBerry 8300 320 x 240 (Curve)
BlackBerry 8310 320 x 240 (Curve)
Blackberry 8320 320 x 240 (Curve)
BlackBerry 8330 320 x 240
BlackBerry 8700 320 x 240
BlackBerry 8703e 320 x 240 (Verizon Wireless)
BlackBerry 8707 320 x 240
BlackBerry 8800 320 x 240
BlackBerry 8820 320 x 240
BlackBerry 8900 480 x 360 (Curve)
BlackBerry 9000 480 x 320 (Bold)
BlackBerry 9500 360 x 480 (Storm)
BlackBerry 9530 360 x 480 (Storm)
BlackBerry Charm 324 x 352
BlackBerry 8100 240 x 260 (Pearl)

WebOS Workshop Notes

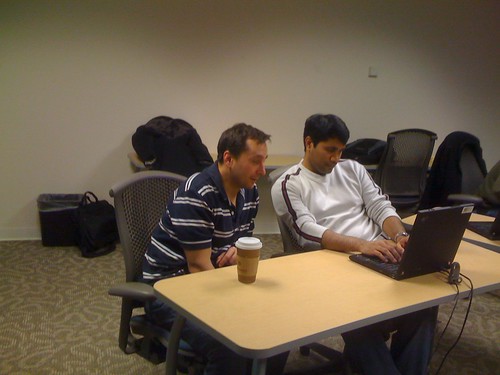
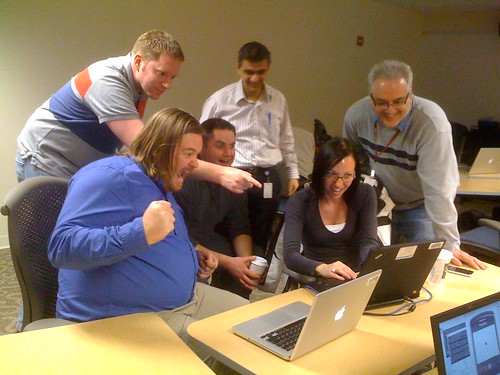
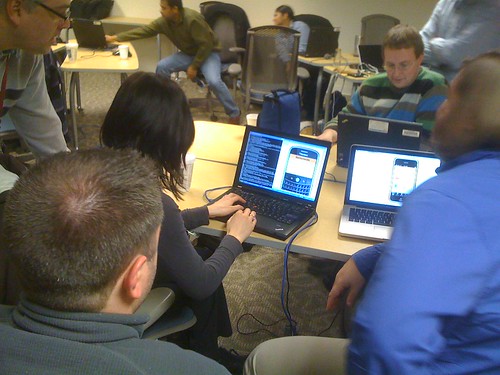
Yesterday’s webOS workshop, hosted at Pivotal Labs, provided an immersive learning experience for Ruby on Rails experts who were Web OS newbies. We required that everyone had installed the SDK in advance and verify their installation by building a very small sample project. I told people ahead of time that they would be turned away if they arrived unprepared. This ensured that all the participants were seriously interested in development and that we didn’t need to spend time on installation. With a relatively short introduction to webOS in the morning, I was impressed with the progress that people made on their apps in the afternoon. People mostly paired — some had planned to do so, but most spontaneously formed at the event. Many thanks to Palm and Pivotal for sponsoring the event and to all the volunteers who helped make it happen.


The hashtag was #webosworkshop.

Below are my very rough notes on the workshop, which I primarily wrote for my own reference, but I’m posting them here in case they help other folks who are just getting started with webOS.

These were the minimal command-line instructions that were needed to verify that participants were ready to code:

palm-emulator
palm-package HelloWorld

Look for “id” in appinfo.json

$ cat HelloWorld/appinfo.json
{
	"id": "com.mycompany.helloworld",
	"version": "1.0.0",
	"vendor": "My Company",
	"type": "web",
	"main": "index.html",
	"title": "HelloWorld",
	"icon": "icon.png"
}
palm-install com.mycompany.helloworld_1.0.0_all.ipk
palm-launch com.mycompany.helloworld

webOS overview

Davis Frank (@dwfrank) gave an awesome overview of webOS specially tuned for Rails developers. He lead the Palm work at Pivotal Labs, where they have built Associated Press, LikeMe.net, and Tweed apps. He also wrote a clock app which is for sale for $1 — everyone should buy it, since he is saving up for a complete Beatles collection. I think he’s about half-way there.

* It’s like a server-side application but there is no request-response cycle
* everything else will be familiar
* HTML5 developers
* Webkit under the hood

In index.html, this is what includes the framework and makes it a WebOS app:

<script src="/usr/palm/frameworks/mojo/mojo.js" type="text/javascript" x-mojo-version="1" />

How is this like Rails MVC?
* Model: POJSOs (pronounced “poi-jos”)
* Views: Interpolated HTML files
* Controllers: Assistants (kinda, sort-of) It’s like WebOS has a controller and the assistant is the part that you can customize. The controller calls specific assistant APIs, it is the delegate that Palm’s controller uses to controll your app.

More notes:
* You don’t actually need to customize the assistant. That is the first thing that gets instantiated.
* Most of your apps will have just one stage. Multi-stage apps: email, apps w/ notification, dashboard panels.
* WebOS is a Linux-based OS w/ WebKit, close to the chrome branch of Webkit

What about testing?

There was no testing framework for webOS, so Pivotal created one. They looked at JSUnit (java), ScrewUnit (jquery, at the time didn’t work on WebOS, and other dependencies as well), JSpec — spent a week trying all of them and none worked, so they created Jasmine, a Javascript test framework, and Pockets, which drives the tests with rake tasks and webOS UI for reporting test results.

Jasmine

A Jasmine spec is just a javascript function

if ("should be able to ...", function () {
 ...
});

There can be nested describes

describe("Something", function() {
  var whatever;
  beforeEach(function() {
     ...
  })
  it("should..."

Any real test framework needs fakes

spyOn(whateverObject, 'doSomething');
...
expect(whateverObject.doSomething).wasCalled();

Pockets

Pockets integrates Jasmine into webOS.

pockets generate myapp

It creates a models directory to support MVC pattern, a plugins directory, and a test directory which mirrors your source code directory, just like in a Rails app.

Instead of maintaining sources.json by hand, it is automatically created when you build with the rake tasks. There is also a specific rake task to create it:

pockets sources [--production]

Live Coding

Davis built an app from scratch in a live coding demo. This made everything concrete in a fun way, and was the ideal prep for diving into webOS coding. Since pockets has not yet been released, you can’t follow these steps unless you got the gem at the workshop, but if you just want to browse the code, it is posted on github.

pockets generate jerry
cd jerry
rake test

Note: dashes in filenames — common in javascript, palm samples were that way, so pockets follows that convention

createFakeSceneAssistant(’jerry’)
* common functions defined to do nothing
* creating a SceneAssistant in an environment
* for building a unit test of a scene assistant and mocking the world around it
* this tests the parts of your assistant that get executed when you call pushScene('jerry')
* what happens “under the hood” for both the createFakeSceneAssistant and real pushScene calls is that the string paramter (e,g ‘jerry’) is used to create the identifier (e.g. JerryAssistant) which is defined in javascript (jerry-assistant.js which is specified in sources.json)

Note:
* RubyMine live templates (to use them just type ‘assist’ and tab to get the assistant template and ‘jdesc’ for describe block and ‘jit’ for an it block.
* jsdocs for webOS recommended

this.controller.setupWidget('jerry')

All the UI elements, Palm calls widgets. You declare them in HTML. jerry-scene.html gets rendered when the jerry-scene is constructed. You declare a widget by making a div.

     <div x-mojo-element="Button" id="buttonId" class="buttonClass" name="buttonName"/>

When we call setupWidget. It walks the dom and looks for widgets (e.g. setupWidget(’quotes’) looks for a div with id=”quotes”). You can look at the actual dom by running with the -i option and using the inspector tool, which will let you modify css selectors and such. However, try not the think about the DOM below the widget.

The second param to setupWidget is a hash of attributes and the third param is your model, which in the case of a list is expected to have an ‘items’ property (although you can specify an alternate name.) You need to look at the API for each widget to know exactly what to parameters are expected.

__defineGetter__ and __defineSetter__ from JavaScript 1.5
forEach — usually native iterator
rememmber: var self = this; before calling forEach
then we can refer to self in the middle of the each

1.3.5 = WebKit3, close to Safari 3.2
1.4 (in beta) = WebKit4
test with Chrome or Safari

in order to enable developer mode, type one of these special commands into the universal search:
* upupdowndownleftrightleftrightbastart (konami code)
* webos20090606

Protype’s interpolation escapes its contents, use minus if you have actual HTML content that you want to add:
#{-

palm launch -i (launches in inspect mode)
palm-log -f com.mycompany.myapp
tails just your app’s part of the log

tips and tricks

* JS isn’t afraid of Objects & Patterns. Read Javascript: the good parts
* APIs deserve objects (e.g. twitter_api.doSomething)

Skinny Controller, Fat Model applies. In webOS, that is: Skinny *Assistant*, Fat Model

use: this.controller.sceneElement

instead of: this.controller.get and this.controller.select
use
* sceneElement.querySelector
* sceneElement.querySelectorAll
allows you to put hashes and dots
allows you to name your classes well enough to index into your dom
you are scoping your search in your scene

you can use jQuery (although you will need to know a couple of hacks to get it to work)
if you have to parse XML, jQuery is hot

css selectors really help you: know your nthchild, first child

css for scenes: make sure to scope all the css to that scene

always add a class to override built-in behaviors

Use the Mojo source: simlink into the SDK, the IDE will index the mojo source, can click in and see what the source code is doing really, good learning tool, nice JS tricks

Project Ares

Matt McNaulty showed a web-based app development tool set, called Project Ares. It has a pretty nice drag-and-drop GUI tool kit, that supports advanced Layout and event handling, plus a full code editor, based on Mozilla’s Bespin project, and a full debugger. You can start on the command-line and import an app into Ares if you want. It works with svn and mercurial — git support is planned. You need to use Safari, FF 3.5 +, Chrome on the mac doesn’t have java

This seems very cool and part of an emerging trend. More and more development is moving to the web. Originally planned as a way to broaden the audience of developers to people not comfortable with the command line or eclipse, they are finding the Ares appeals to a lot of experienced developers who can use the other tools, but prefer Ares.

Questions?

What about persistence? depot APIs, no real ORM yet
persistence of app data off the phone? not backed up (yet). HTML5’s db content for the web browser (and Palm’s built-in apps) does get backed up.
Note: Depot is just a wrapper around HTML5

You can pull any app of the phone and look at the source, but I didn’t catch exactly how to do this

What classes are Enumerable in Ruby?

Enumerable is a powerful mixin that provides some really slick operations on collections. I started looking at it since I think it is important to teach map and inject, but ended up teaching about most of its methods, since they are so cool. I found a great series of exercises and added to it to create a worksheet for the Rails class I’m teaching.

I wondered how to find whether a class is Enumerable and which Ruby classes were Enumerable. I was hoping to find some kind of picture of class inheritance for Ruby, but @techiferous pointed out Ruby’s ObjectSpace and @MikeG1 provided a the exact snippet of Ruby code that showed me exactly what I wanted:

ObjectSpace.each_object(Class) {|cl| puts cl if cl < Enumerable}

Notes from Rails 3 bugmash

Blazing Cloud hosted a “Do One Thing for Rails 3″ bugmash and Workshop curriculum hacksession. We had four participants:

We followed wycats instructions for getting started. Some pre-conditions that weren’t spelled out:

  • Ruby 1.8.7 is required, which implies a re-install of rubygems (you need 1.3.5+) and your gems as well
  • [sudo] gem install bundler

Rails 3 discoveries

1) Karen and I discovered that cucumber doesn’t work with Rails 3 — the generator isn’t available so we couldn’t even get started. I added that to the gem compatibility list. Also, I didn’t report it, but noticed that the script/generate help isn’t given when you pass no params.

$ ./script/generate cucumber
Could not find generator cucumber.
$ script/generate
Please select a generator.
Builtin: active_record:migration, active_record:model,
active_record:observer, active_record:session_migration, app,
controller, erb:controller, erb:mailer, erb:scaffold, generator, helper,
integration_test, mailer, metal, migration, model, model_subclass,
observer, performance_test, plugin, resource, scaffold,
scaffold_controller, session_migration, stylesheets, test_unit:controller,
 test_unit:helper, test_unit:integration, test_unit:mailer,
test_unit:model, test_unit:observer, test_unit:performance,
test_unit:plugin, test_unit:scaffold.

2) Sharon discovered what appears to be an incompatibility between bundler and XP Home.

3) The very first time I did scaffold, I got an “ActionController::InvalidAuthenticityToken” error when I ran the app and tried to create a new record, but when I dropped the database and tried to reproduce it worked fine.

Things we learned that have nothing to do with Rails 3

  • bundler is not only a gem, but also a plugin to RubyGems
  • cucumber (post 0.4.5) is split into two gems: cucumber and cucumber-rails